Below is a complete recipe for how to build stylish, efficient and quiet mining pods from scratch. It is my second try at building crypto coin mining systems, after using a few mining-rig-in-a-crate units. We have fully tested the procedure, and it works. The tricky steps are blacklisting the nouveau driver and enabling NVIDIA fan speed control.
This is the overall procedure in this post:
[ ] Setup hardware
[ ] Configure BIOS install CentOS 7.4
[ ] Install CUDA 9.1
[ ] Install Software to enable control of GPU fan speed
[ ] Install mining software (example: XMR and ETH)
[ ] Group servers into pods
Hardware
Using open frame rigs has its advantages, but it will keep you busy maintaining it, and it just looks bad. It was time to build something for the longer term:
I selected the HP Z620 Workstation, an about 7 years old product with excellent specifications, including a 90% efficient power supply, two PCI-e 3.0 slots, dual LGA2011 socket Intel Xeon processor support, incl. 8-core CPUs with 20Mb Cache (Xeon E5-2650), great ECC support, system diagnostics, and on and on. Most importantly, refurbished servers and CPUs are for sale at excellent low prices (if you search well), probably a sweet-spot for our purposes. The design of these units is first-class, and it’s a pleasure using and maintaining them.
Used Z620s come in two flavors, differed by BIOS boot block date. Boot blocks dated 2011 cannot be upgraded to support newer generation Xeon CPUs. This does not prevent you from updating the system BIOS, but the range of supported processors will remain limited. We are fine with that. Other than that, Z620 come with and without second CPU board, and if you purchase a unit without second board installed and later want to upgrade, you’ll have to hunt for a second board that includes the special bracket that replaces the top PCI-e expansion cover.
According to the specifications, the graphics cards alone may not consume more than in total 300 W., i.e. two GTX 1070 cards, or perhaps a single GTX 1080 Ti. You would have to step up to the Z820 (service guide) with the 1.1 kW PSU option for more, but at an higher server cost. The Z820 has 3 PCIe slots x16 and can accommodate at least 2 GTX 1080 Ti’s using a Molex to 8-pin conversion cable for the fourth GPU power connector. There is space for a third GPU but I have not tried it out. The Z820 is expensive as a starter system, but upgradability seems almost unlimited.
The BOM, as of December 2017:
[ ] Refurbished HP Z620, 2x CPU E5-2603 1.8GHz, 16GB RAM $320
[ ] Refurbished 2x Intel Xeon E5-2650 2.0GHz CPUs, $110
[ ] Netis wireless bridge (4 ports) $15
[ ] 2x Nvidia FE GTX 1070 $800
Total: $1,245
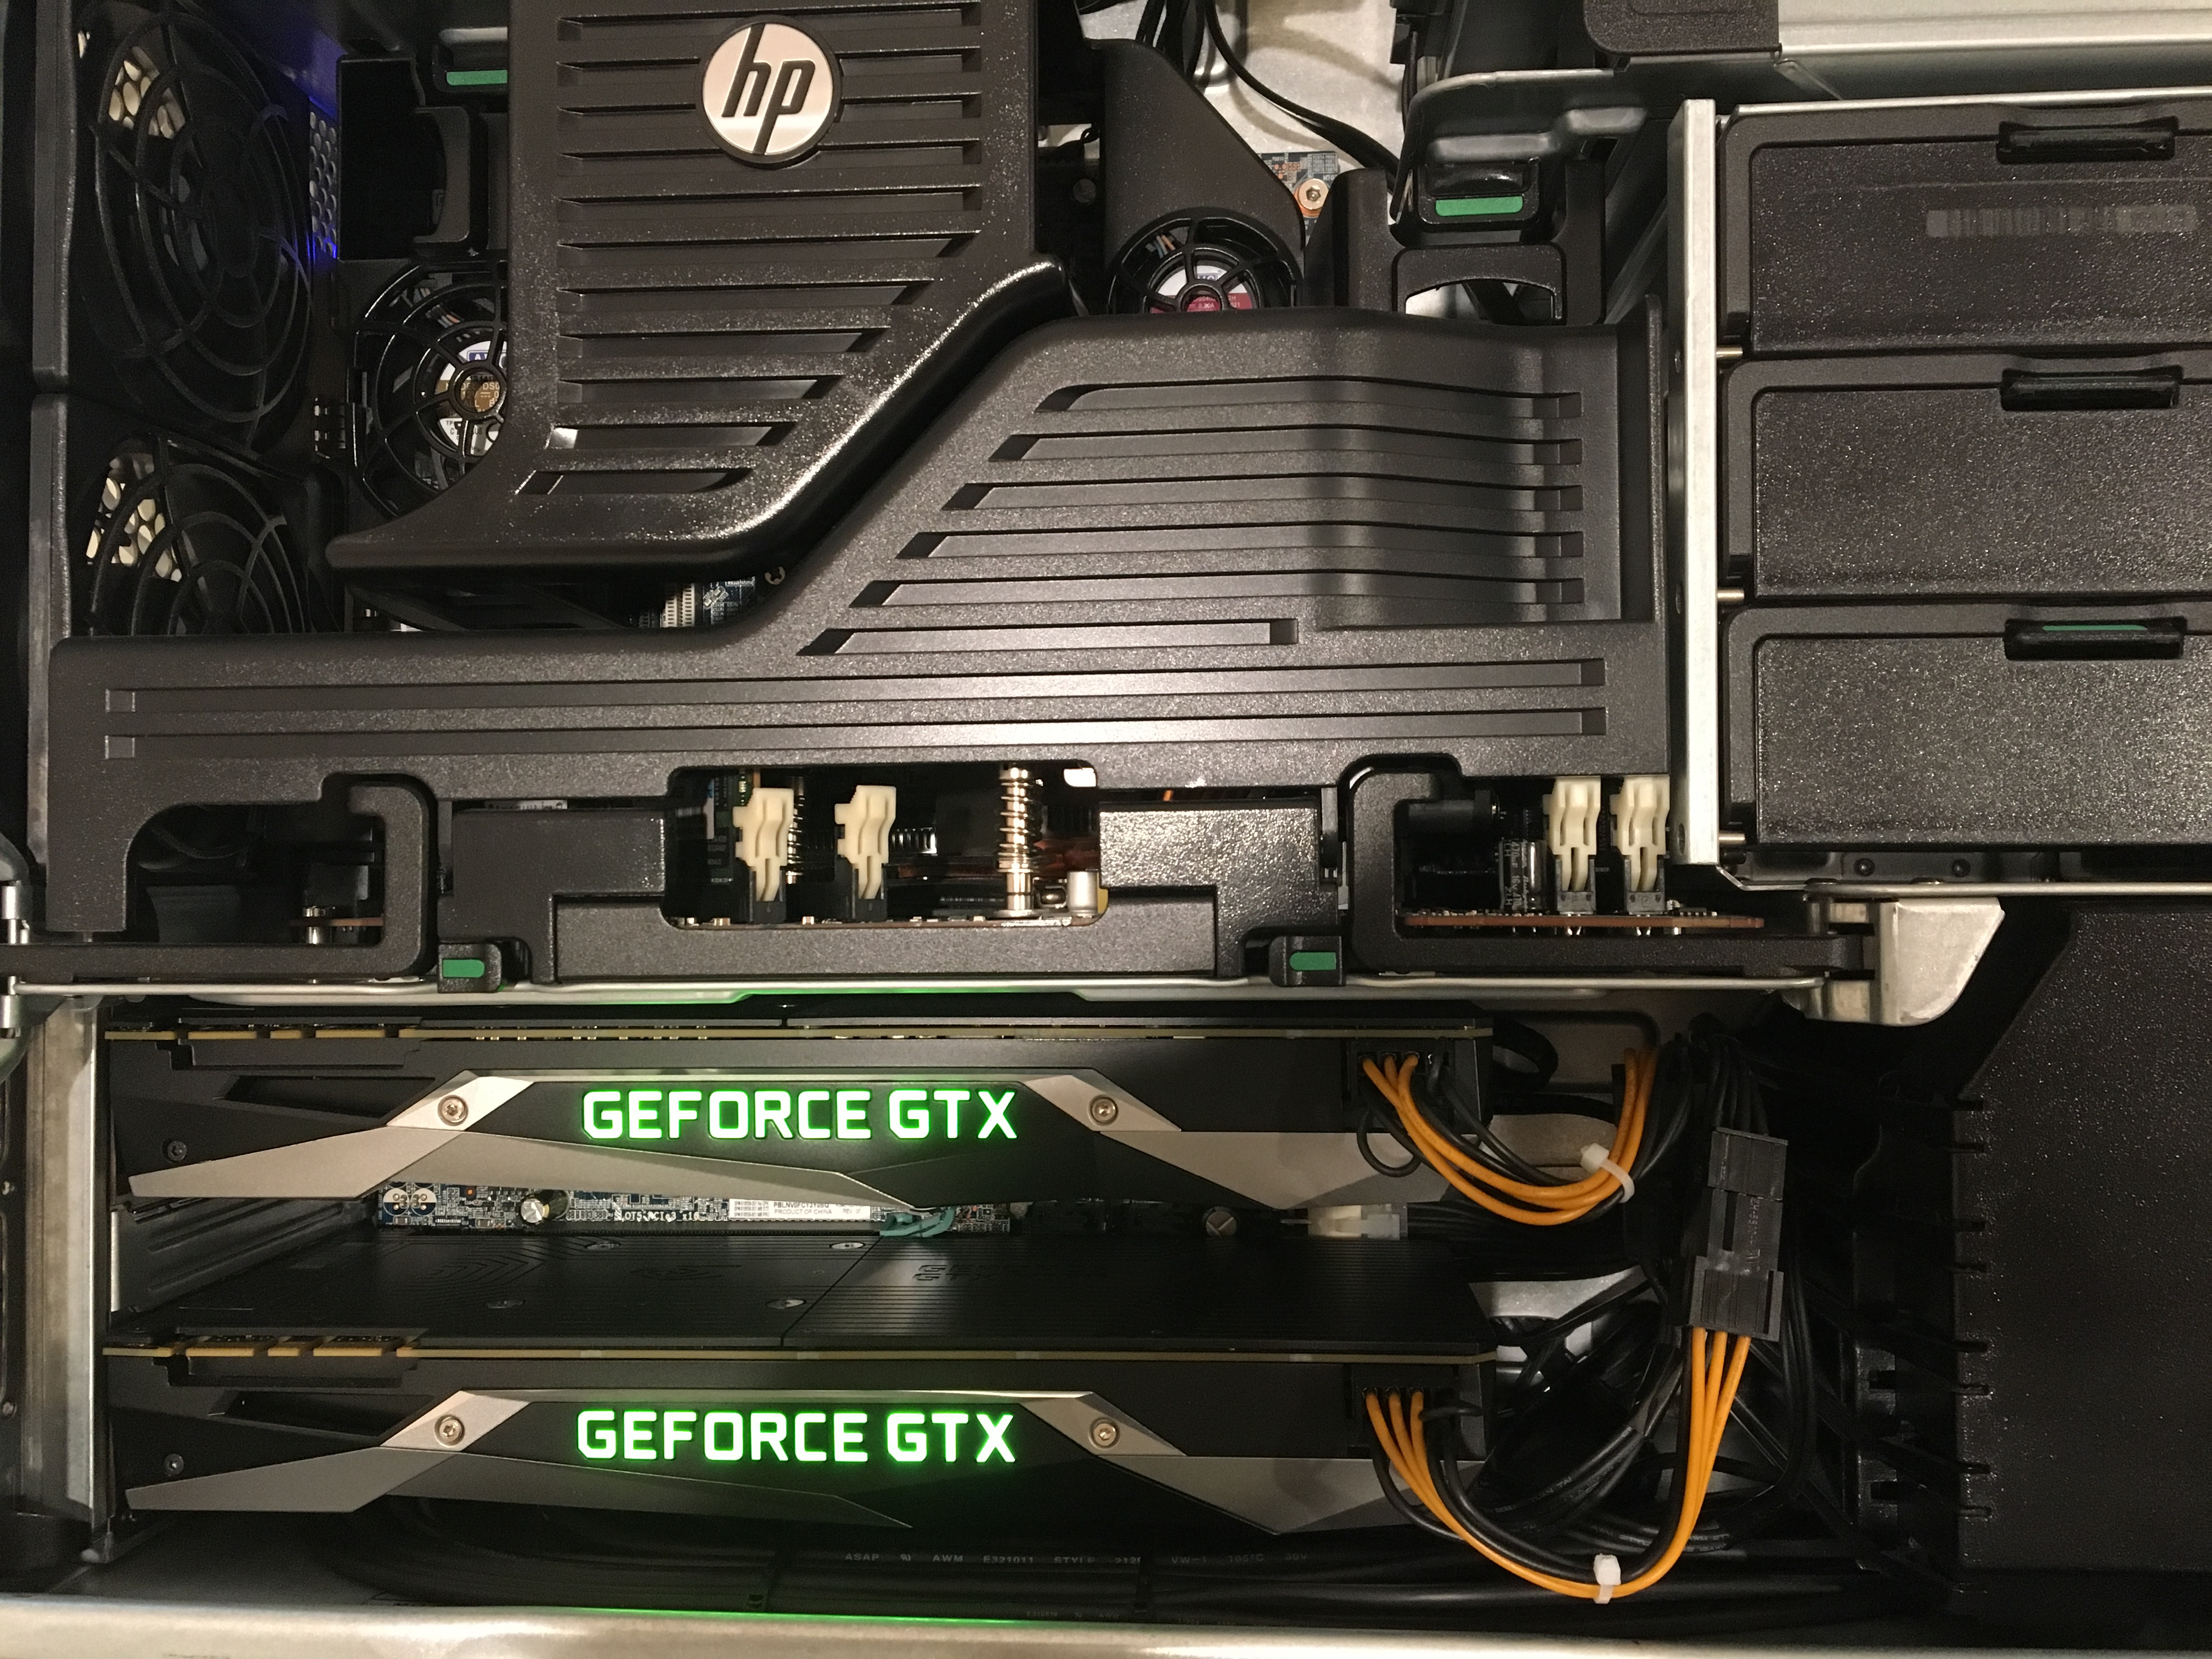
Internals of an HP Z620 with two E5-2650 CPUs and two NVIDIA GTX 1070 FE GPUs.
The first steps are as follows:
[ ] Run MemTest86 Pro v7.4 Free, testing all cores and memory
[ ] Rearrange the cables on the bottom of the case to allow insertion of large GTX cards into the lower full-size PCI-e slot.
[ ] Upgrade BIOS to the latest version (we use J61 v3.91)
[ ] Upgrade CPUs as needed and re-test MemTest86
[ ] Enter BIOS configuration menu using <F10> at boot
[ ] Disable power savings options, in particular Enable PCIe Performance Mode
To protect the unit from dust, we cover the front of the servers with a dust filter material.
BIOS Settings
Here are some of the BIOS configuration settings I used initially: SATA mode= AHCI; UEFI Boot Sources= Disabled (Booting from UEFA DVD-ROM device did not seem to work completely well the first time); Secure Boot= Disabled; DEP, VTx, VTd= Enabled, but Intel TXT(LT)= Disabled. OS Management of ESD= Enabled. Factory Recovery Boot Support= Disabled. (<F1> provides some minimal explanation for each of the options.)
On a second try, I found that UEFI Boot Sources= Enabled, and booting the CentOS7.4 DVD-ROM as a UEFI Boot source works too without issue. However, building my own customized DVD-ROM supporting UEFI booting was not so straightforward.
The Ethernet network (with a router’s DHCP server on it) was connected to the main LAN port. I tested the CentOS installation with a NVIDIA NVS 310 graphics card, and the second time with a NVIDIA GTX 1050 Ti card installed.
It is possible to use Replicated Setup to read or write BIOS settings to a USB stick. Edit the resulting file, and remove the options you do not want to change when you read the configuration on another system.
Operating System
While most miners seem to use easy-to-set-up Ubuntu 16, we took the time to get things working on our preferred OS, CentOS 7.4 (1108). This previous post describes how to customize and build your own installer media, but you can also use the standard “Minimal” installer. The page listing mirrors for ISO installer images is here. Pick a server close to you, or pick one directly from this list, or find what you want starting here.
[ ] Download the Minimal ISO image for CentOS 7.4 (e.g. CentOS-7-x86_64-Minimal-1708.iso - Sept. 13, 2017.)
[ ] Optionally confirm the SHA256 checksum of the image file bba314624956961a2ea31dd460cd860a77911c1e0a56e4820a12b9c5dad363f5, on MacOS:
shasum -a 256 <iso-file-path>
[ ] Burn the ISO to a DVD (it's 830.5 MB)
Potential Trouble
The first time using CentOS 7.4 (1408) or 7.3 (1611) resulted in “An unknown error has occurred” in “storage.py at line 839” that prevented installation. This did not happen using CentOS 7.1 (1503) installer. Selecting on the Error window “More info…” and [Debug] and then <Alt><Tab> to get to root shell prompt, I tried to erase any traces of former RAID configuration data on the (refurbished) drive:
dmraid -r -E /dev/sda
<y>
reboot
After booting the installer again, the issue was resolved and the installation of CentOS 7.4 could proceed. Set the installation destination (reclaim space, deleting all data, if needed), Ethernet interface (select the plugged in LAN port, turn ON (this will show IP address from the DHCP server), set host name (e.g. my_host_name.localdomain), and optionally Configure static IP (IPv4 – Manual; Add address, net mask, gateway), time zone, keyboard (I added French, Canadian Multilingual), etc. Then [Begin Installation] after which you can take your time to set Root password and create your user account (and make yourself the user administrator by checking the box).
CentOS7.4 by default seems to require you to accept an empty EULA on the terminal once, but this does not impact any other operation of the system.
Remote login
Boot the system, login on the terminal, and note the IP address (“inet”) of the LAN interface:
ip addr
Next, we use our terminal from MacOS and ssh to login and configure the system remotely. (Delete the line with the IP address of the new system from the ~/.ssh/known_hosts file if the IP address was used before with another server and LAN interface.)
CUDA 9.1 Installation
CUDA 9.1 (9.1.85-1) with driver version 387.26 (which does not seem to display consumed power anymore though for 1050Ti cards) is available and it seems to work with the other software we plan to use so we can stop using CUDA 8.0 (we used 8.0.61-1 before). For additional reference, NVIDIA instructions for CentOS/RHEL are here. The archive with all version is here.
(You can view available software version with sudo yum –showduplicates list <package_name> and specifically install a particular version by adding version to package name.)
[ ] Download RPM(local) version of CUDA9.1 from NVIDIA here to your remote PC
[Linux][x86_64][CentOS][7][rpm (local)][Download]
[ ] Copy the file from your remote PC to the server, typing on the remote PC (MacOS)
scp cuda-repo-rhel7-9-1-local-9.1.85-1.x86_64.rpm <userid>@<ip_address>:/home/<userid>/
[ ] Login to your server (assuming your user id on remote and server are the same)
ssh <ip_address>
[ ] Install rpm
sudo rpm -i cuda-repo-rhel7-9-1-local-9.1.85-1.x86_64.rpm
[ ] Install epel-release repository (tested version 7-9) and dkms (version 2.4.0-1)
sudo yum install epel-release -y
sudo yum install dkms -y
[ ] Install kernel headers and dev packages (our kernel was 3.10.0-693.el7.x86_64)
sudo yum install kernel-devel-$(uname -r) kernel-headers-$(uname -r) -y
[ ] Install cuda-9.1.85-1 (or just cuda if you only have one version available)
sudo yum install cuda-9.1.85-1 -y
Backlisting Open Source drivers
Next we will have to blacklist the open source Nouveau driver.
[ ] Edit /etc/modprobe.d/blacklist-nouveau.conf
sudo vi /etc/modprobe.d/blacklist-nouveau.conf
[ ] Add to the file so that it includes the following
blacklist nouveau
blacklist lbm-nouveau
options nouveau modeset=0
alias nouveau off
alias lbm-nouveau off
[ ] Save and exit
[ ] Backup the current initramfs
sudo mv /boot/initramfs-$(uname -r).img /boot/initramfs-$(uname -r)-nouveau.img
[ ] Create the new initramfs (in Ubuntu it is sudo update-initramfs -u)
sudo dracut /boot/initramfs-$(uname -r).img $(uname -r)
[ ] Reboot
sudo reboot
[ ] Login and try if this lists the status of the GPU(s)
nvidia-smi
Useful Utilities
Screen
Install screen (version 4.1.0-0.23) to run processes in the background and connect to them easily at any time.
sudo yum install screen -y
Create a screen running a process with screen -dmS <screen_name> <process_command>
Enter the screen to connect to using screen -r <screen_name> . And disconnect from the screen with <Ctrl><a><d> which leaves the process running in the background even when you log off!
Xorg
To control the fan speed and certain other parameters of the NVIDIA cards, you will need a running Xorg.
sudo yum -y groupinstall "X Window System"
These are the software versions installed:
glx-utils                              x86_64    8.2.0-3
initial-setup-gui                      x86_64    0.3.9.40-1
mesa-dri-drivers                       x86_64    17.0.1-6.20170307
plymouth-system-theme                  x86_64    0.8.9-0.28.20140113
spice-vdagent                          x86_64    0.14.0-14
xorg-x11-drivers                       x86_64    7.7-6
xorg-x11-server-Xorg                   x86_64    1.19.3-11
xorg-x11-utils                         x86_64    7.5-22
xorg-x11-xinit                         x86_64    1.3.4-1
xvattr                                 x86_64    1.3-27
Enable GPU Control
To enable control of certain attributes, the parameter coolbits needs to be set to 7 for fan speed control only enabled, or 31 for everything enabled.
[ ] Enable "coolbits" to get access to certain control attributes
sudo nvidia-xconfig --enable-all-gpus --allow-empty-initial-configuration --cool-bits=31
[ ] Reboot
sudo reboot now
After adding a GPU later, you need to execute this again to add entries for the new card.
If you have trouble controlling the fan speed of more than one GPU, use this line to configure X.
nvidia-xconfig --enable-all-gpus --allow-empty-initial-configuration --cool-bits=31 --sli=off --no-base-mosaicCUDA Miner Installation
XMR Miner
A CUDA miner for Monero (XMR) is built from source as follows:
NOTE: As of begin April 2018, the Cryptonight algorithm that Monero uses has changed to shut out ASIC miners. The following procedure works with git reset –hard ef87d28 to check out version 2.3.0 or git reset –hard 26a5d65 for version 2.4.3, both with monero7 / modified algorithm. Select to mine “monero7”.
[ ] Install scl (software collections) (centos-release-scl 0:2-2)
sudo yum install centos-release-scl -y
[ ] Install git (version 0:1.8.3.1-12)
sudo yum install git -y
[ ] Install cmake3 (0:3.6.3-1), devtoolset-4-gcc* (0:5.3.1-6.1), hwloc-devel (1.11.2-2), libmicrohttpd-devel  (0.9.33-2), openssl-devel (1:1.0.2k-8)
sudo yum install cmake3 devtoolset-4-gcc* hwloc-devel libmicrohttpd-devel openssl-devel make -y
[ ] Enter SCL bash shell
scl enable devtoolset-4 bash
[ ] Clone the repository and enter the top directory
git clone https://github.com/fireice-uk/xmr-stak.git
cd xmr-stak
[ ] pick commit 7584ea8 version 2.2.0 (or skip this for newest but untested)
git reset --hard 7584ea8
[ ] Optionally adjust donation level to developer
vi xmrstak/donate-level.hpp
[ ] Create build directory and change directory
mkdir build
cd build
[ ] Build for CUDA
cmake3 -DOpenCL_ENABLE=OFF ..
make install
[ ] Exit SCL bash
exit
For CPU mining increase memlock limits, and enable huge pages, then reboot:
[ ] Append to file /etc/security/limits.conf
sudo vi /etc/security/limits.conf
* soft memlock 262144
* hard memlock 262144
[ ] Append to file /etc/sysctl.conf
sudo vi /etc/sysctl.conf
vm.nr_hugepages=128
[ ] Reboot
sudo reboot now
ETH Miner
Build a CUDA miner for Ethereum from source like this:
[ ] Change directory to top
cd ~
[ ] Clone repo
git clone https://github.com/ethereum-mining/ethminer.git
[ ] Select a specific version (or skip this for newest but untested)
cd ethminer
[ ] update submodules
git submodule update --init --recursive
[ ] select commit (tested 0.14.0rc4 (3eaf0ec), 0.13.0.dev0 (5bd2b34))
git reset --hard 3eaf0ec
[ ] Build for CUDA
mkdir build; cd build
cmake3 -DETHASHCL=OFF -DETHASHCUDA=ON ..
sudo make install
[ ] Confirm the location of the miner here: /usr/local/bin/ethminer
ls /usr/local/bin/ethminer
[ ] Or use the copy in ethminer/build/ethminer/
Refer to the Github pages or mining pool help sections for information how to configure and run the miners.
Standard Mining Pods
To protect servers from dust, buy some filter media and cover the front of each. I bought a 90 ft. roll of Air Handler Filter Media MERV 8 material of a width similar to that of my servers at a reasonable cost around $25. Cut a bit longer than the server’s height, tuck one edge under the front feet and pull the filter media tight through behind the front handle of the server. Very cheap and the white side out does not look too bad.
You can group 2-3 servers together into a pod, depending on the GPUs and their power consumption. Connect the servers to a wireless bridge, a quality surge protector, and an optional Watt meter and power switch, and place them on an electrical circuit separate from any other pods.
Caution: You are responsible for avoiding overloading your specific electrical system (or worse), and for safety in general; do not do this yourself if you do not have the necessary experience.
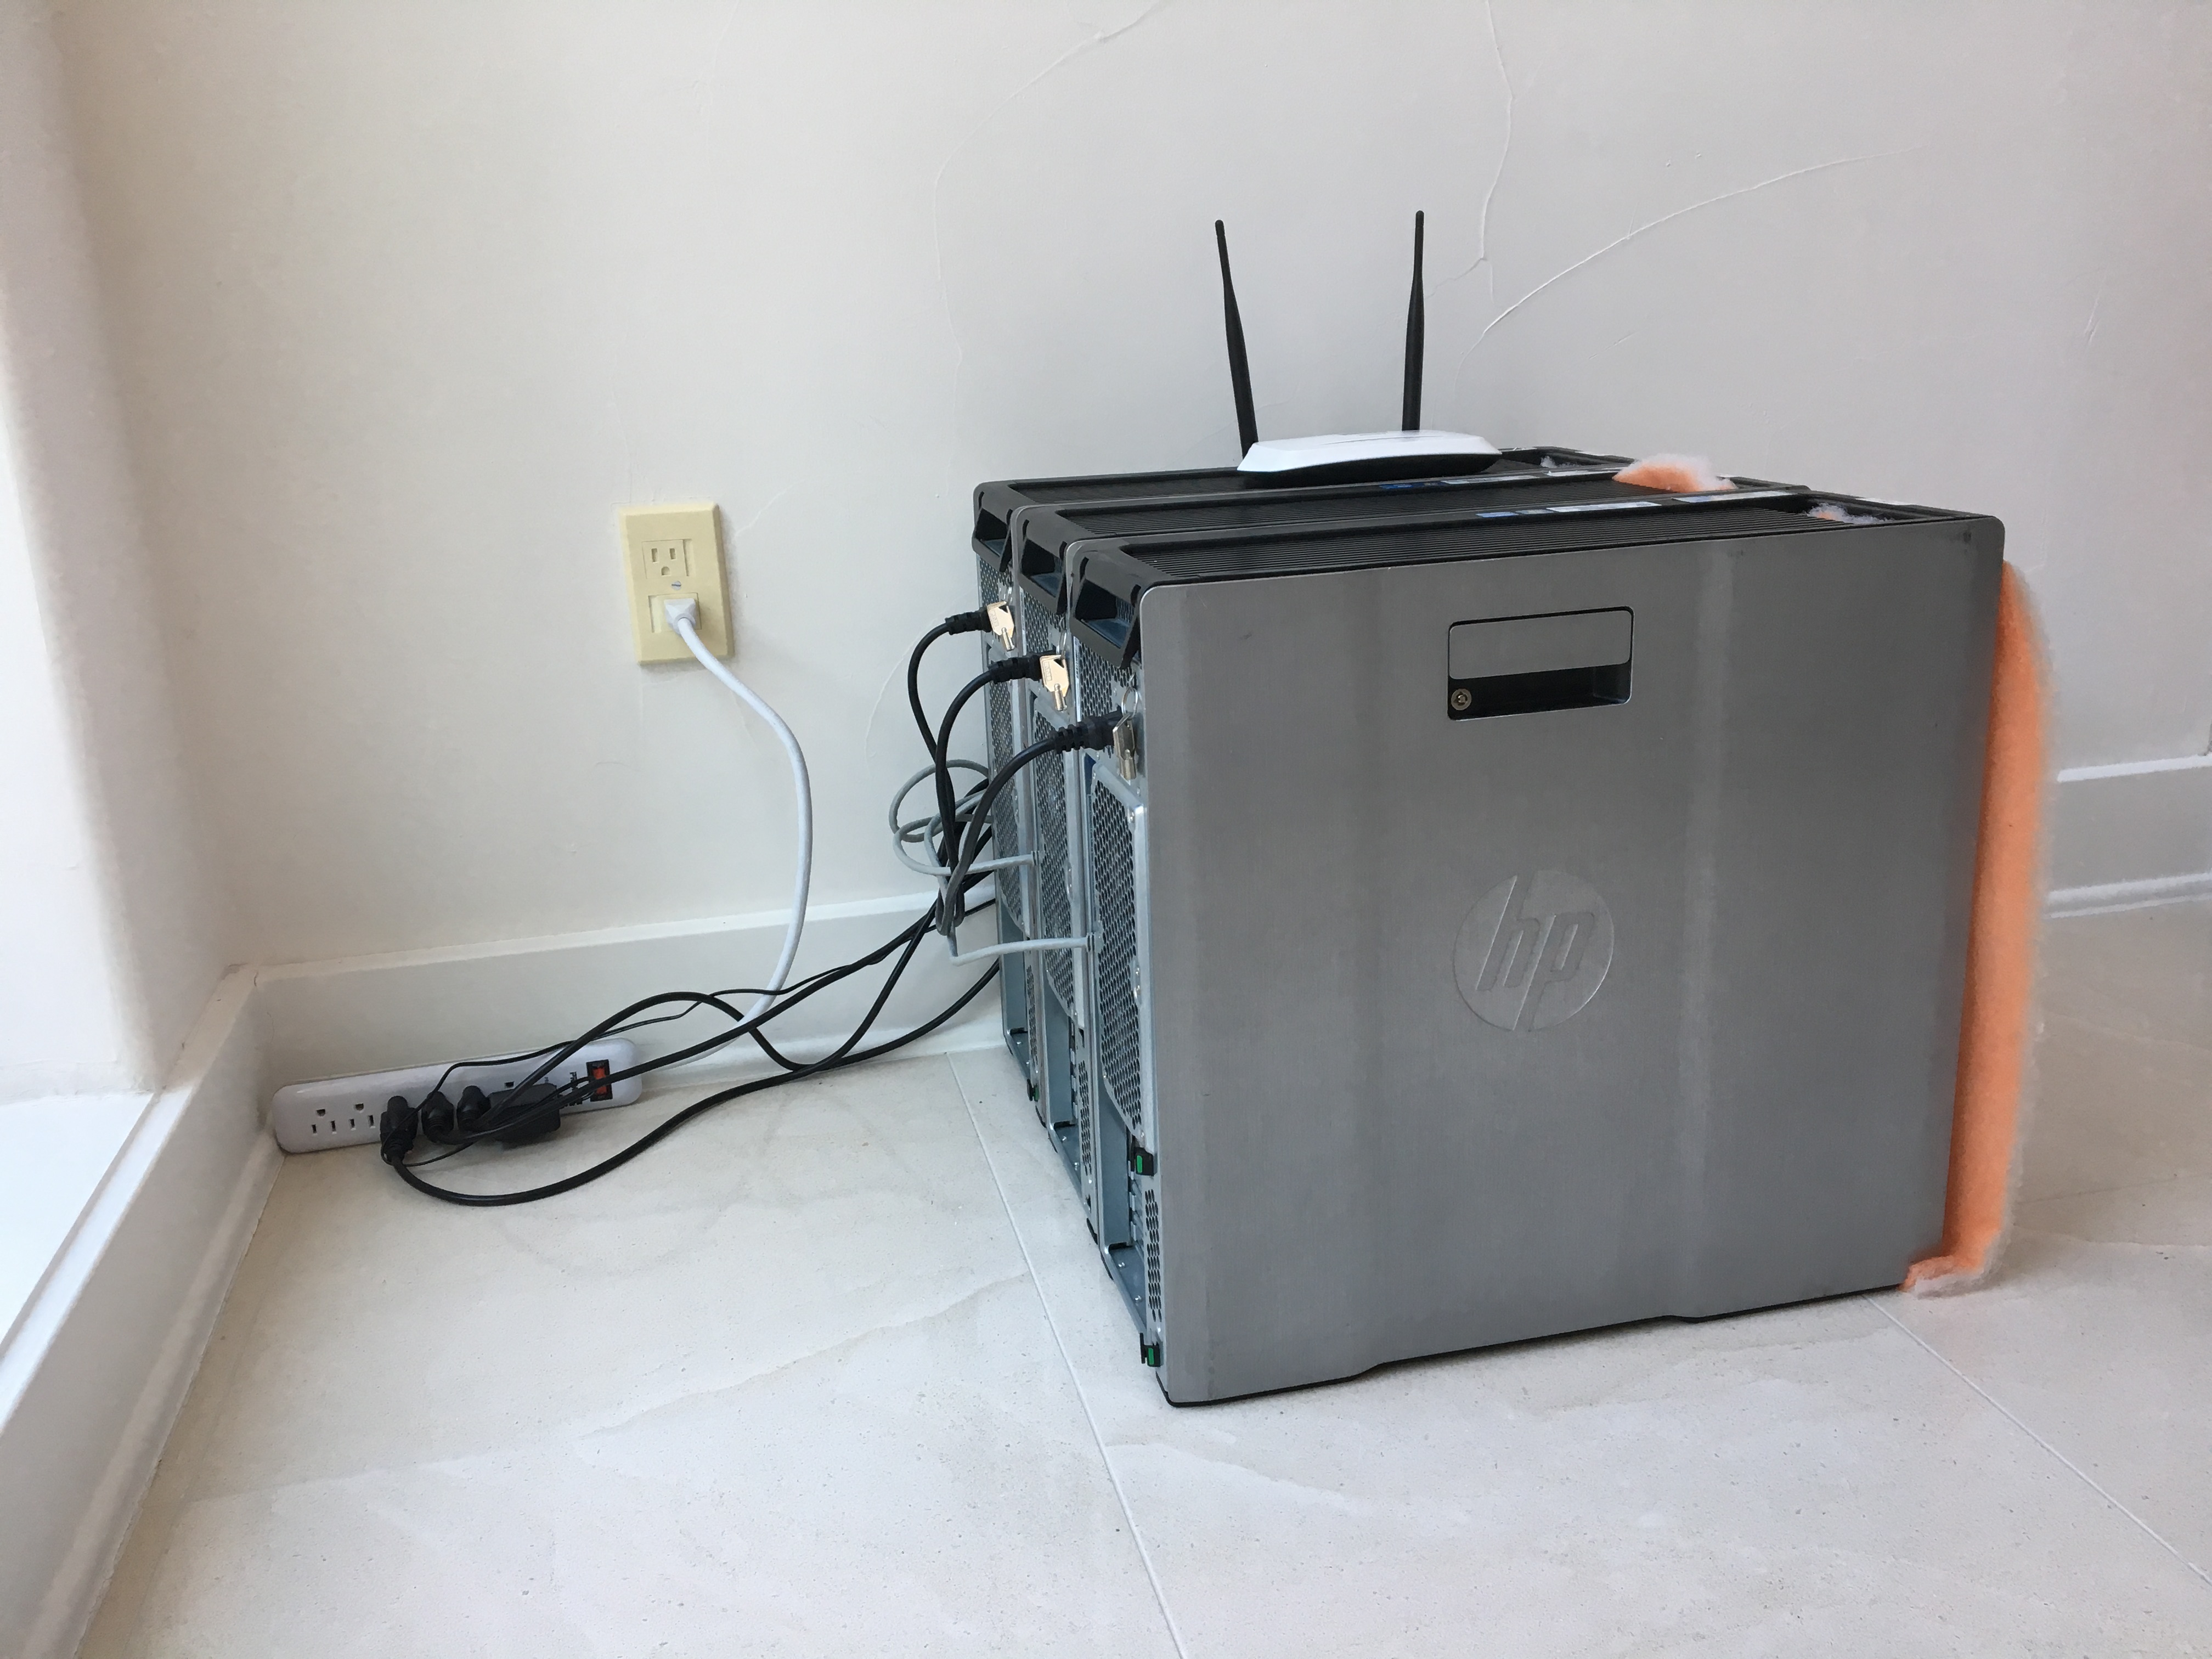
Mining pod consisting of three HP Z620s with various GPU configurations, looking good.
Misc. REFS
updated: 20180128; 20180207; 20180330; 20180401; 20180411; 20180504; 20180531; 20210526; (style 20240311)